DIY - Bio-composite infusion project [2017]
- Dust It Yourself - Sophie

- Feb 28, 2020
- 3 min read
We are surrounded by "composites" almost all day long on board a performance carbon sailing yacht. Lots of carbon (dust) and epoxy resins especially during the refit period in France [2016/18]. Don't get us wrong, we love carbon and composites as you can see in our blog posts. We like to produce our own parts out of carbon and/or fiberglass. But this time we went onto unknown grounds - Bio-composites.
In France, a good friend and "master of the industry" got us "hooked" up. There was no way around, we had to try it ourself. The idea of using natural fibers for a composite structure was just too appealing for DIY and we love the result.
The project for our first application of bio-composites was quickly found. We needed new little L-shape brackets to mount inside the galley cupboard. The brackets are installed to keep all plates and bowls in place. On board a boat each equipment needs a "fixed" space and even if we are sailing in comfort on a catamaran, we don't want the plates to move around.
The original brackets were made out of glued teak wood strips, they sometimes broke at the glue joint.The idea was to make new brackets in a sandwich construction out of cork for the core and two layers of linen on each side for the outer skins.
First step was to produce a mould to give the brackets the correct shape. The mould was made out of plywood and gelcoat to have a smooth finish and a airtight surface. For our other custom composite projects we often use wet-layout of fibers with or without vacuum. This is depending on the necessary strength to achieve. This way of manufacturing was not possible with the natural fibers. Logic concluding - "infusion" of the parts.
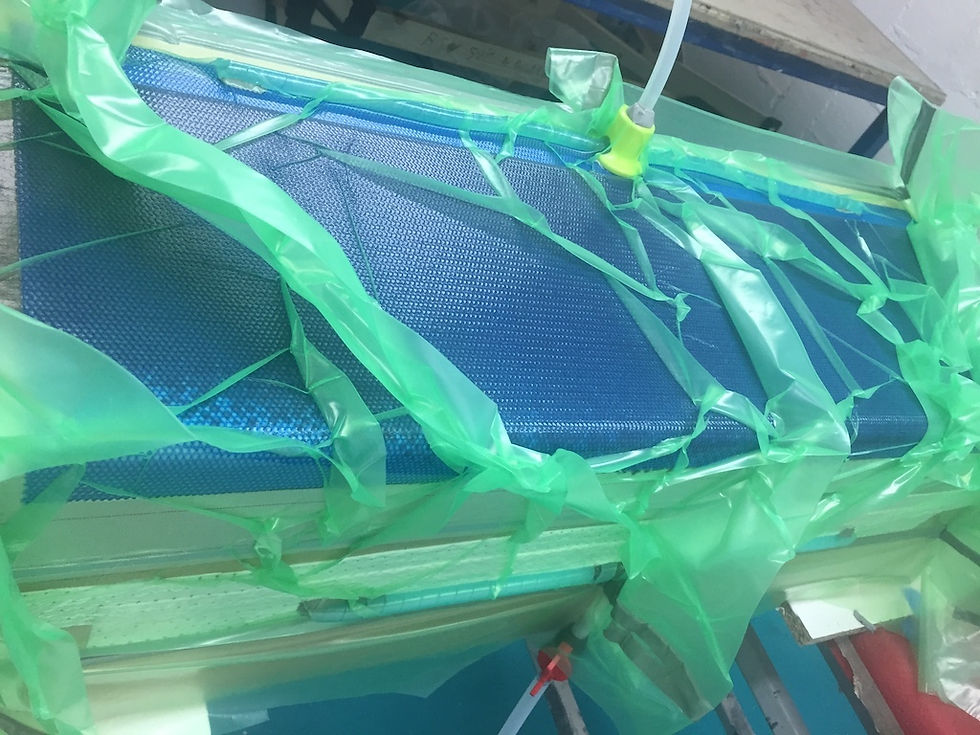
Our first infusion of bio composite happened under Erwan's supervision. The mould was ready and we got the necessary supplies - Erwan help us with the set up of the fabrics, supplies, vacuum bagging and calculation of the necessary quantity of resin for the cork/linen combination. He is doing lots of research and projects of different Bio-composites and it's great to learn from the best...
For the infusion, we used special bio two component epoxy resin from Sicomin, that's more "green" - Infu Green. According to the supplier, this "Epoxy resin is produced with about 38 % of carbon from plant origin and has a lower environmental impact than standard Epoxy systems." If going bio-composites, let's go as far as the technology allows.
By the way Sicomin also supplies the linen tissue, they have a whole range of different fabrics. Our 4mm cork for the sandwich core comes from a local home-supply shop as by chance it was of the correct thickness.
After a successful infusion and a full night of vacuum for curing - we were very exited when it was time to de-mould. Our infusion process was a success and the result is great - pretty stiff and super light - we love it.

The following steps are to cut the brackets square and into different sizes so they can hold our plates in place. We also drilled holes for small screws to mount them in place . For the finish touch we applied several layers of resin and clear coat to have them shiny. Not easy to place them upright to be able to spray paint the clear coat.

We absolute love the result and the style of our first Bio-composite DIY project and we will definitively do more of them in the future. The little L-shape bracket are just the beginning.
After this first test and when time permits, we will explore this composite options for bigger projects like a bio-composite fender for the CB750 Four [motorbike] or body parts and the dashboard of Yasmine our 2CV. This gonna look just super sexy and very unique... But not only the look also the stiffness and the weight saving aspects are great for those future projects. Lots of options and possibilities for DIY - we are going to "dust it"...

![[2020/2021] Bali - Indonesia](https://static.wixstatic.com/media/50eef1_2fe7af72e05144da938d69aa05c9c5b6~mv2.jpeg/v1/fill/w_980,h_653,al_c,q_85,usm_0.66_1.00_0.01,enc_avif,quality_auto/50eef1_2fe7af72e05144da938d69aa05c9c5b6~mv2.jpeg)
![DIY - DC Power distribution panel [2017]](https://static.wixstatic.com/media/50eef1_dbb6f4c1ced34bca82d25237885021b3~mv2.png/v1/fill/w_980,h_561,al_c,q_90,usm_0.66_1.00_0.01,enc_avif,quality_auto/50eef1_dbb6f4c1ced34bca82d25237885021b3~mv2.png)
![[2020] Panama Canal [March]](https://static.wixstatic.com/media/50eef1_233c98c6b00b4118886123a6320d0fed~mv2.jpeg/v1/fill/w_640,h_480,al_c,q_80,enc_avif,quality_auto/50eef1_233c98c6b00b4118886123a6320d0fed~mv2.jpeg)
Comments